In the free motion stitching class that I took in the fall, we made fabric leaves and a candle holder for autumn décor. I loved this, as I didn’t have any decorations for fall, and felt my home was lacking. Here’s how I made them.
Gathering leaves to trace
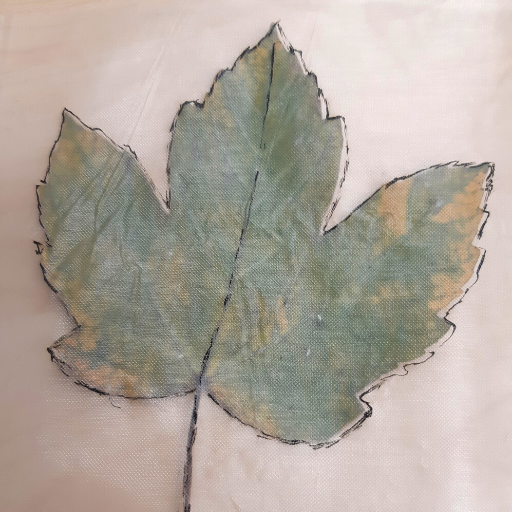
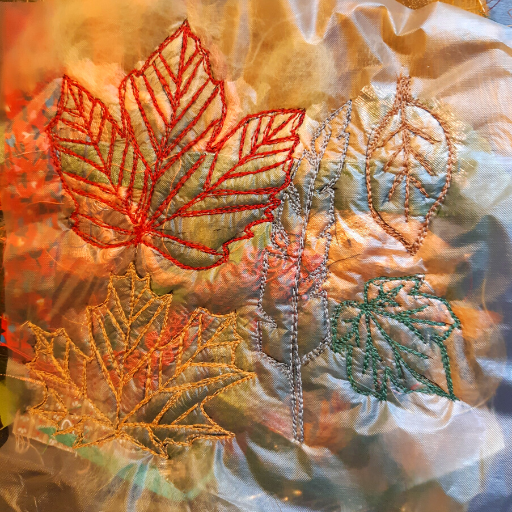
First, I gathered my leaves. I happened to have pressed leaves from that season so I decided to use those. I wanted a bit more variety so I used the leaf outlines printed from the internet. I traced these using a gel pen on water soluble stabilizer.
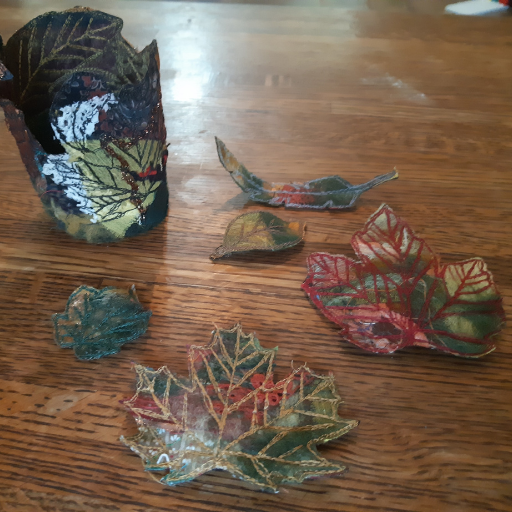
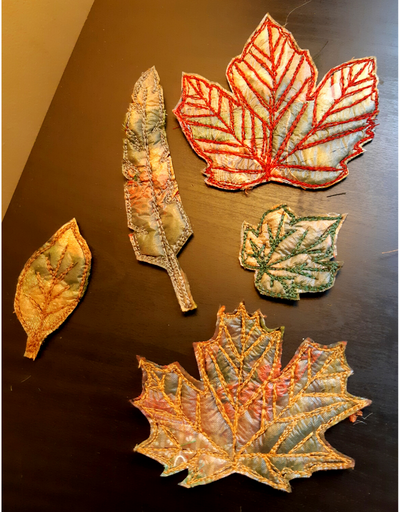
I traced out four individual leaves and one feather. I also did a collage style strip of leaves about 10 inches by 3.5 inches. Some of them overlapped each other. As you will see in the images, this strip was used to make the candle holder, while the individual pieces were molded and used as separate decorations.
Preparing the textiles and stitching
To make the individual leaves I placed down a piece of thin, sheer fabric, then a piece of black heavy weight interfacing and then layered different fall colored fabrics, threads and wool roving over top. Then I placed my leaf tracing on top of the fabric and free motion stitched at least 4 times around each leaf and on the veins as well.
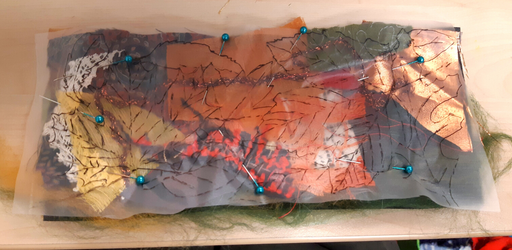
For the candle holder, I laid down another piece of thin, sheer fabric, followed by my strip of thick black interfacing. I then layered the fabrics, threads and wool roving. I placed my collaged leaf tracing on top of this and pinned it down.
Just like the individual leaves, I free motion stitched over the collaged leaves at least 4 times.
Cutting and rinsing
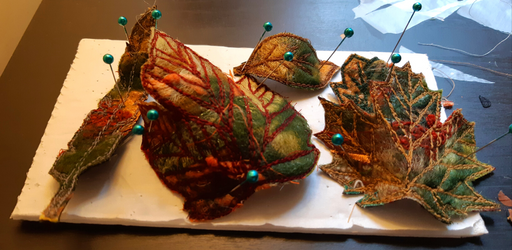
Once stitched I cut out the individual leaves all the way around.
For the collaged piece, I left the bottom edge untrimmed and cut around the top and side edges so the shapes of the leaves would be more noticeable. Then I rinsed all my pieces in warm running water.
Molding the leaves
While the individual leaves were still wet, I took a foam board and pinned the leaves down into forms that I liked. I let them dry in this way. Because I didn’t completely rinse out the stabilizer, there was a bit of stickiness to them that allowed them to hold shape once dried. I could also have applied some Elmer’s glue with a paint brush and allowed to dry. I might do this if they lose shape over time.
The strip for the candle holder was pinned onto a paper cup that was covered in Saran wrap, and left to dry. Afterwards, I hand-sewed a circular piece of black felt to the bottom to complete the candle holder.