It’s been a goal of mine to learn how to do free motion stitching. Mostly, I’d like to use it on a project I have in mind for a Christmas tree skirt. But I’d also like to do some free motion quilting on my next quilt (not that I quilt a lot). I think free motion stitching is beautiful and expressive.
So when I found this IN PERSON course while perusing Instagram one day, I was sold. I took a class called Creative Sewing: Free Motion Stitching. It was taught by Karen Kroeker at Fraser Valley Continuing Education.
Oh my gosh. I had so much fun! I had never used a free motion/darning foot before so this was VERY new to me. I had been wanting to learn for over a year and was too intimidated and this course gave me the boost that I needed to give it a try. I had also been apprehensive about wasting my fabrics but Karen’s course showed us how to use up the tiniest scraps and even those thread ends, to create some pretty beautiful and unique pieces.
First Practice
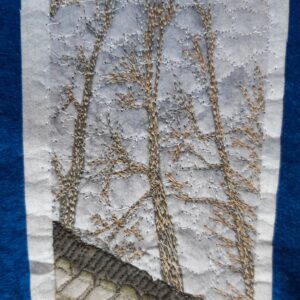
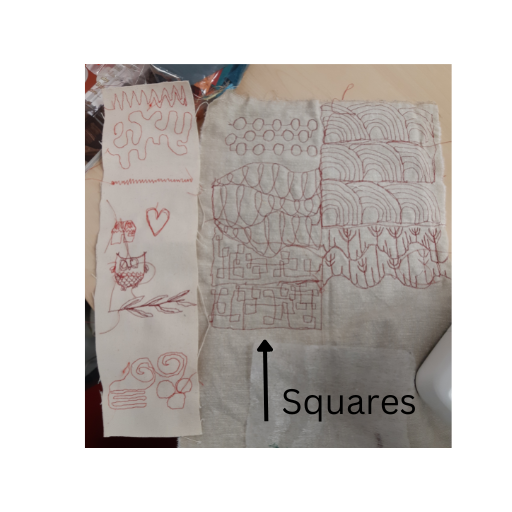
Here is a pic of my first attempts. I looked at a few images for inspiration and then just tried copying them myself.
On the left is a thicker piece of woven fabric, and the right hand side is thinner fabric backed with a piece of thick black interfacing.
I laughed my head off trying to do the squares as I kept stitching myself into a corner and couldn’t get out.
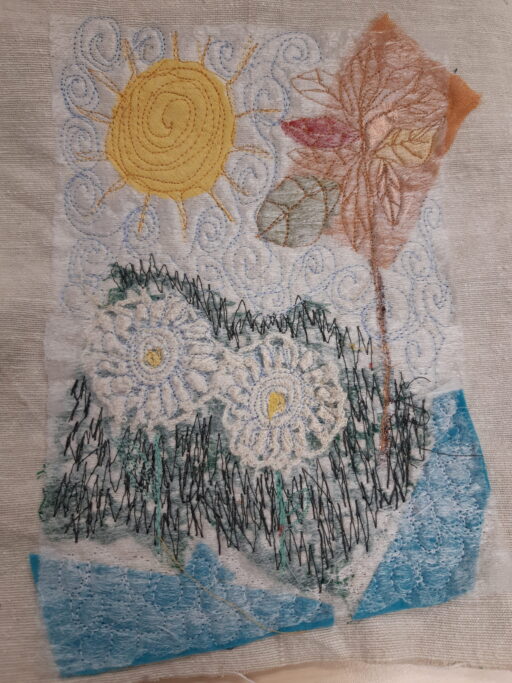
First Practice Project
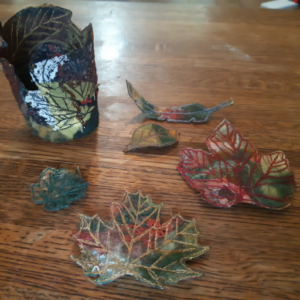
Our first practice project was to loosely lay down some scrap pieces of fabric. Then I overlayed it with a used dryer sheet, which subdued the colors, giving it a softer appearance. Once it was under my sewing machine I stitched some designs over top to produce an image. I think mine is inspired by the confusing fall season we have had here in New Westminster (read: Vancouver, BC, Canada). This project is all about practicing stitching after all, so focus on that rather than the desired result. The layers from bottom to top are: thick black interfacing, muslin-type fabric, a few scrap pieces to create the image and topped with a dryer sheet.
If you too want to give free motion stitching a try, you’ll need a few items, but most you likely already have at home.
- Sewing machine
- Free motion/darning foot (you’ll also have to lower your feed dogs, so check your manual or look around for a lever. I found mine at the bottom back side of my free arm)
- Thread (lots of thread, for this class I started thrifting thread. Easier on the environment, easier on my wallet)
- Machine needle (I usually just used a universal 80/12, but whatever works)
- 8 X 8 inch (20cm X 20cm) piece of fabric to stitch on (if its quite thick, this may be all you need, if its average or thin, then interface it with thick interfacing or felt from the dollarstore
Remember that it’s your hands on the fabric that moves it under the needle (not the feed dogs). And it’s a combination of both the speed of your hands moving the fabric, as well as the speed of your pedal moving your needle up and down that results in your stitch length.
Select your zigzag stitch, set your stitch width and length both to zero, and get stitching!